 Hyperfocal Design
Here’s another quick post if you’re interested in creating sharpened HDRIs (not tone-mapped HDRIs, which is pretty straight forward and actually LDR).
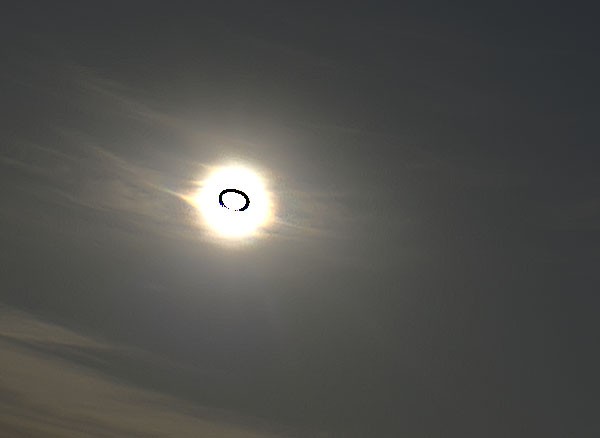
The issue when sharpening an HDRI (a 32bit .hdr or .exr) is that software like Photoshop wasn’t built to sharpen 32bit, HDR images. So while most of your image (notably the lower dynamic range areas) will be sharpened properly, as soon as you get to the sun, you’ll see some ugly coloured/contrasty image artifacts. I assume this is because Photoshop doesn’t know what to do, or that the sharpened result is magnified 100x due to the brightness or huge contrast:
Either way, currently it doesn’t seem possible to sharpen a HDR after merging, so we are left with sharpening brackets pre-merge. Please let me know if you know of any 32 bit sharpening software!
I’ve taken two example bracket sets here from the same sky and left one set unsharpened, and the other sharpened reasonably heavily in Lightroom. I’ve then merged both to HDR in the same way just using Photomatix.
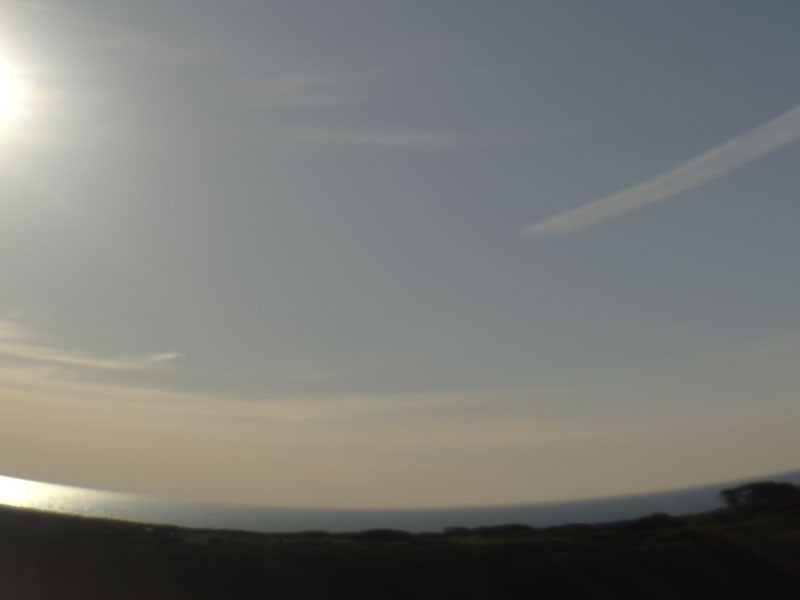
Here’s the zero sharpened version, tonemapped with exposure/gamma so it can be displayed on this web page:
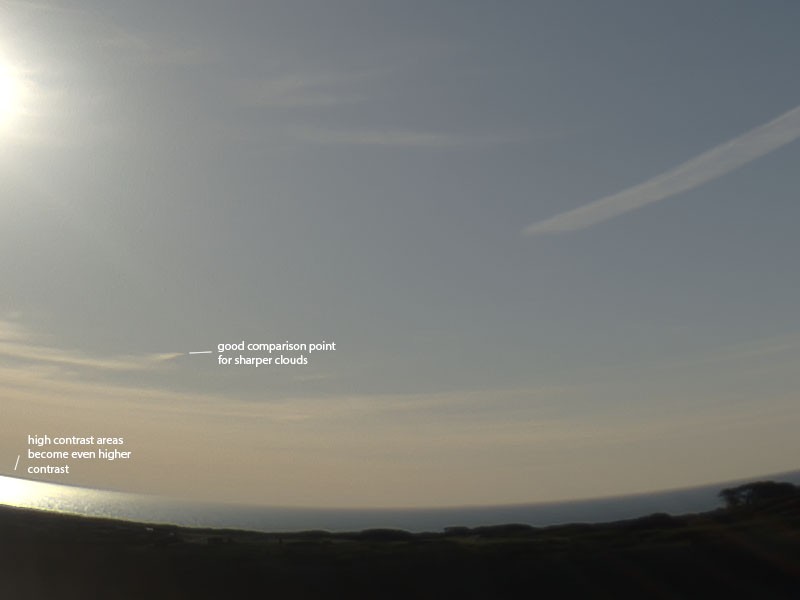
and the sharpened version:
Sharpening per bracket
As our aim with sharpening HDRIs is going to be visibly sharper clouds or environments, it is unnecessary to sharpen anything but the first 1-2 brightest brackets in the sequence. You will still get the same dynamic range whether you’ve sharpened the sun or not. This will also reduce the chances of you having artifacts around the sun and other high contrast areas that are most effected by sharpening.
Sharpening the HDRI using a mask
Sharpening could also be applied to the end result .hdr or .exr using masking or a feathered selection to sharpen all but the sun. For this time-lapse project this might be more trouble than its worth, most likely I would have to animate a moving mask around the sun in After Effects which could look strange with clouds passing in front of the sun.
Short and sharp
For skies, the longest exposure you take will affect how sharp your end result is, as will the speed of the clouds, and also the time between brackets. So if you’re shooting on a windy day (shaking tripod) with fast clouds and a 2 second end exposure/1 second gap between shots you’ll end up with some blurry ghosted looking results. So shoot fast and try to limit your longest exposure to 1 second if possible.
Other options
I know that Neat Image has some basic sharpening for HDRIs, however it applies only to 32bit TIFFs, which would add another lengthy conversion to my workflow for time-lapses. It might be an option if you are working with single HDRI frames, however.
If you have any other tips you’d like to share for sharpening HDRIs, I’ll post them here.
What’s your sharpening workflow?
Would love to hear from some potential users here – for the time-lapse HDRI sky domes, would you prefer I leave the EXR frames unsharpened, so that you could adjust in post or per layer yourself, or do you feel some base level of sharpening is required? Its a fairly big question as its obviously impossible to de-sharpen, and the number and size of the files is quite big, so I wouldn’t really want to provide two versions. In the past I’ve always left my skies unsharpened as they are individual images (not footage) and the resolution was so high that it wasn’t so much of an issue. The dimensions for these time-lapse frames is also on the lower side, making sharpening more important. Please give me your thoughts in the comments!
