 Hyperfocal Design
This is a Blender HDRI tutorial using Blender’s Cycles rendering engine. We will be using a free sample of a Hyperfocal Design V-HDRI sky, which is a downsized version of the original. To follow along or view the finished scene, you can download a free VHDRI Skies image and the Blender scene here: Download Blender HDRI Tutorial!
You can view this tutorial as simple text/images or watch on youtube:
For reference, we are using version 2.67.
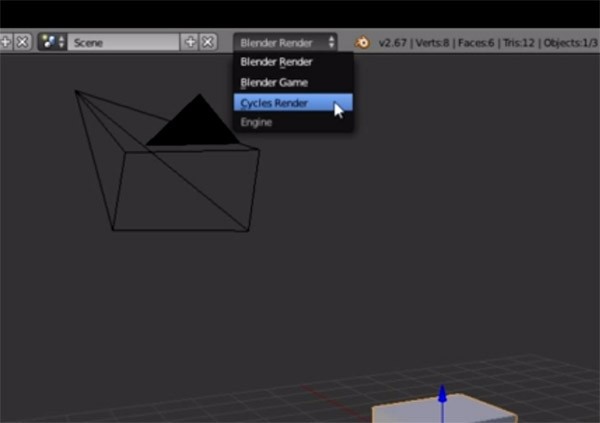
Ok firstly, we need to use Cycles for anything in this tutorial to make sense. At the top/middle of Blender you can assign the render engine to Cycles. Make sure you also have GPU rendering selected under the Render tab if you have an NVidia card:
Delete the lamp so we are only using HDR lighting, then add a plane so we can see the shadows cast from the cube by the HDRI light source.
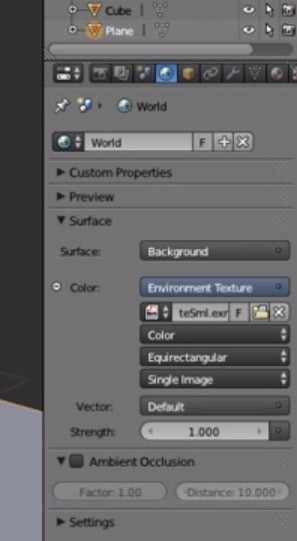
Now to load in the HDR Environment map, go to the World tab, then Surface. Use Nodes, leave Surface as background, and for Color we want an HDRI Environment map, so choose environment texture. Use the Hyperfocal HDRI or your own, and thats all you need to do for basic HDRI in Blender Cycles!
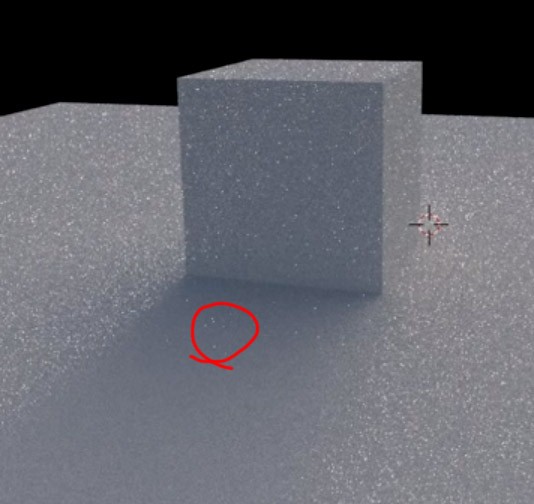
Change to rendered view mode to check the lighting. You’ll notice that the shadow is quite fuzzy and the image isn’t very bright considering the cloudy day HDRI we are using. You’ll also possibly notice “fireflies” or speckled lighting. This has something to do with the way that Blender and Cycles samples HDR images. While we don’t really need to know the inner workings of Blender, essentially what is happening is that most rays are hitting the relatively dark sky, and occasionally a ray will hit the sun, bounce back and hit your scene, creating speckling. Using more samples (Render tab -> Sampling -> preview samples) can sometimes fix this if the effect isn’t too extreme, but there are better solutions. Regardless, make sure you set something like at least 50-100 samples.
To solve this firefly issue, go back to World tab, Settings and change Importance Sampling to 1024 or 2048. Now, far more rays will hit the sun, giving us a brighter scene and less speckling/fireflies. You can further adjust the brightness of your HDR and the lighting it gives off by using the Strength variable.

If you still have speckling, especially with reflective/transparent/bouncing light, you can adjust Blender’s clamp setting in the Render tab under Sampling. Clamping the maximum light level will effectively cut off the super bright parts of the sun, and reduce any remaining fireflies. A value of 2-3 is probably good, but just adjust to suit your situation. Cutting this number down too low will somewhat negate the point of HDRs in the first place! You can also try upping the importance sampling even further.

If you have lots of bouncing/reflected light, try upping Filter Glossy to something around 0.1 to 0.5, in Render tab -> Light Paths. This will smooth out the bounced light rays.
And that’s about it! There are some more complex things we can get into with Nodes for different diffuse and reflection maps, but this was just a quick starting point that requires the minimum of fuss.
Thanks for following along!
For more HDRI skies or environment maps, check our website, www.hyperfocaldesign.com